
If you are a gardener who doesn’t have a lot of horizontal space, wants to cover an unattractive wall, or just wants something different, a vertical garden is a great alternative to a regular outdoor garden. Vertical gardens save space on porches, decks, and patios. Plant them with herbs and keep them near an outdoor grill or in your kitchen. Use them to screen a view, add color to to a plain wall, or to keep houseplants near a sunny window. They’re easy to assemble. Just add imagination, and the sky’s the limit. Below are the steps to take to develop your own vertical garden.
Article Snapshot:
- Choose a container, pocket, wooden planter, or structure for your vertical garden.
- Place the garden in the amount of sun that your plants need.
- Choose from succulents, vegetables or perennials.
- Make sure your structure is deep enough in the ground so it is stable.
- Use PittMoss Performance potting soil since it has controlled release fertilizer and extra nutrients.
- Train your plants to grow vertically.
- Keep extra plants on hand in case some plants die off.
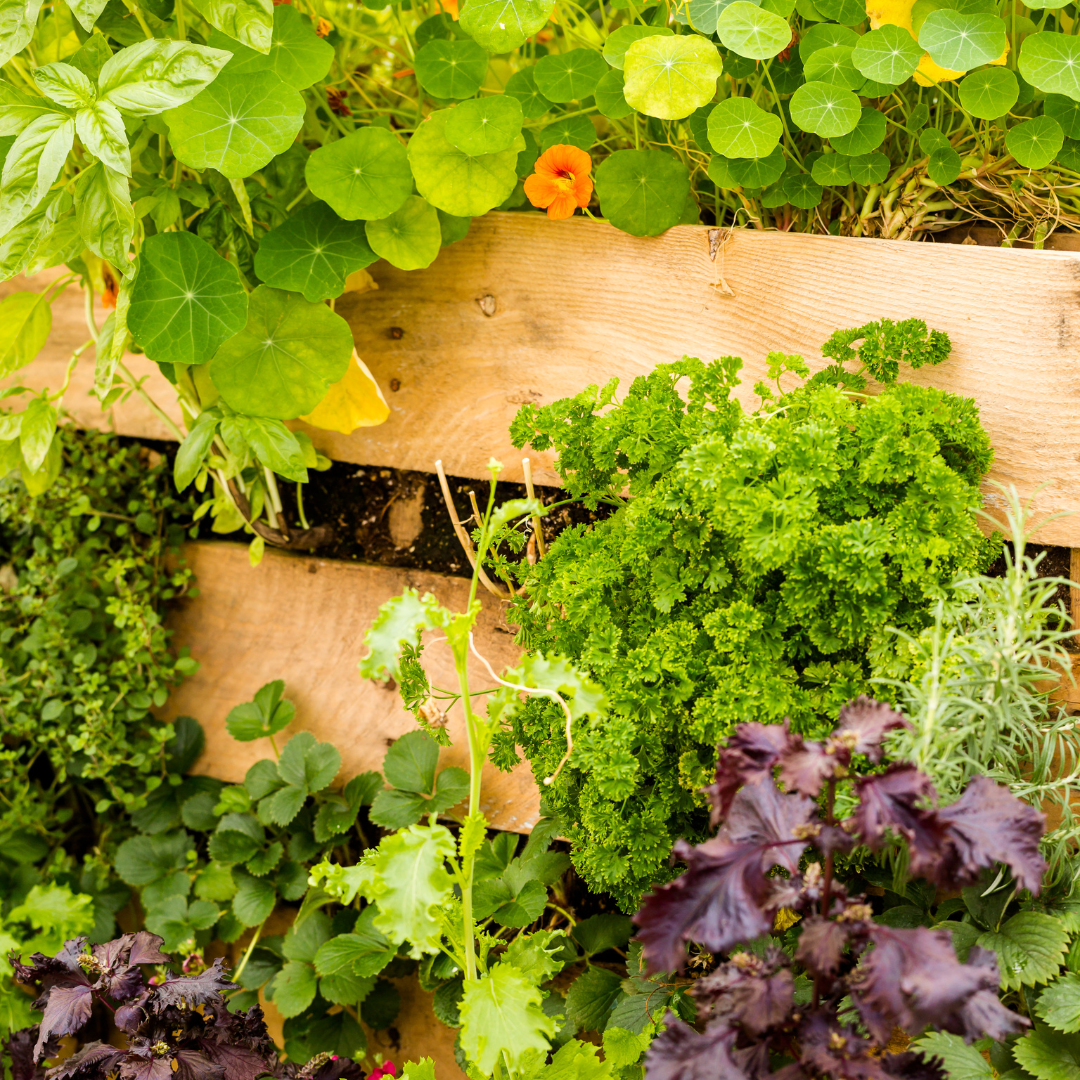
Step 1 – Choose your type of garden. One easy option is a container-style garden, which means potted plants are attached to a wall or displayed in rows, or planters are stacked. Another is a “pocket” garden, featuring plants tucked into pockets made from felt or canvas. Vertical gardens can also be grown in a large plastic or wooden wall planter with slots or panels, or in recycled wooden shipping pallets—for these systems, the soil is less contained, so wire mesh is occasionally used to prevent the contents from spilling. For bigger, more intricate vertical gardens, you can use a structure. In the beginning of the season, the structure offers an interesting visual anchor; a month or so later it is completely transformed by the plant and then later by the harvest. Some types of structures are:
- Tuteur – An obelisk-shape tuteur is well-suited to serve as a centerpiece or, in pairs, at entranceways.
- Arbor – A crop-draped arbor makes the perfect portal leading into a vegetable patch or, when set into the garden’s interior, a visual landmark or shaded opportunity to ponder the tasks at hand.
- Trellis – Choose a trellis that’s sturdy enough to support the plant and its bounty as it climbs and is big enough that you’ll see portions of it at the end of the season, when the plant has fully matured.
If you don’t want to spend money on buying a structure, you can use one that is already in your yard like a tree, bamboo pole, fence or deck.
Step 2 – Choose where to place garden. A vertical garden can go just about anywhere – indoors or outdoors. Let the type of sun exposure the plants will need determine where you place the garden. To be safe, choose a space that has “half-exposure,” as opposed to full shade or full sun. Some of the containers available are modular so you can hang them outside for the summer and bring them indoors for the winter.
Step 3 – Choose your plants. In addition to succulents, you can try growing herbs, vegetables, trailing varieties like philodendron, native perennials (amaryllis is a popular one), and ferns.
For vegetable vertical gardens, most already grow on vines, making them great candidates for a vertical garden. Peas and beans naturally twist and curl over stakes and trellises, and many of them also produce pretty flowers in the spring. Tomatoes also grow vertically in order to stay healthy and produce a lot of fruit. Your summer will be filled with juicy red goodness.You’ll want to be aware of the “flexibility” of these plants since you’re growing them vertically.
For flower gardens, look for flower and ivy varieties that prefer to grow toward the sky. Be sure to choose plants that do well in your particular region. Morning glories grow fast and strong, and they produce gorgeous flowers in many different hues. Wisteria, which blooms purple and produces a lovely scent, is a popular choice for vertical gardens. English ivy provides a pleasing green backdrop for more colorful flowers. Climbing roses will give your vertical garden a romantic touch.
Woody varietals—like trees, shrubs, or vines—have rigid, wooden stems, so they’ll grow parallel to the floor and stick out instead of flowing down. On the other hand, herbaceous plants, like flowers and ferns, have soft, green stems, so they’ll “droop” down.
Step 4 – Make sure your structure is stable. If you’re using a trellis, a stake or a pole, be sure to bury it deep in the ground so that it doesn’t wobble or fall over. Remember that the garden will get heavier as it grows, and it will need a solid foundation that can stand up to wind and rain.
Step 5 – Start with planting basics. Plant around the base of the structure. Taking into account the individual needs of the plants you are using, plant seeds or seedlings in holes spaced around the base of the trellis, pole or other structure you are using. Make sure they aren’t too close to each other or the structure so that they’ll have room to root and grow. Use PittMoss Performance potting soil since vertical gardens dry out quickly just like pots will. PittMoss Performance helps retain the water and hold in the moisture. Plants that don’t need as much water are recommended for the top part of the garden, since that part dries quickly. Place the ones more suited for wetter conditions at the bottom of the system.
Step 6 – Train the plants. When the seedlings get a few inches high, it’s time to train them to wrap around the structure you erected. Gently wrap the stems of the plants around the base of the structure, taking care not to bend or break them. Use ties to hold the stems in place as they grow. Don’t tie the stems too tightly. This prevents them from growing properly and may actually damage the plant. As the stems begin to grow and wind around the structure, continue using ties to train them to grow in the direction you want them to grow.
Step 7 – Keep extra plants on hand. Naturally, some greens will die out. You might lose a couple of plants, so you’ll get holes and it will start to look bad. Keep a few extras on the side as a backup or insurance, so you can just plug in the new one. This is especially easy if you have a container-style garden where there’s more of a separation between the plants.
Happy Gardening! Have any suggestions for our next how-to blog? Email us at info@pittmoss.com
Add comment
You must be logged in to post a comment.